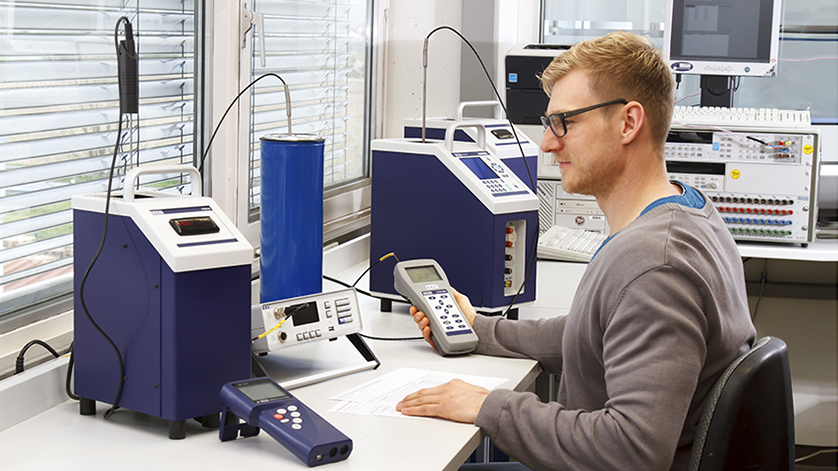
Not all calibrations are the same. This is illustrated by the example of “Thermometer calibration” – which test method is used depends on various factors such as process conditions, quality standards and safety requirements. Depending on the method, the calibration item can even be attested as having twice the accuracy of the measurements. This can be a crucial aspect for increasing process efficiency.
Temperature is the most common measurand in industrial processes. This means that thermometers are installed in large numbers in corresponding systems. Thus, models and performance spectra are oriented to the respective control tasks. From their requirements and the environmental conditions, the verification of the measuring instruments is also derived.
Thermometer calibration – sense and necessity
The calibration of temperature measuring instruments makes sense and is necessary for a variety of reasons. Firstly, the calibration of thermometers, such as thermocouples, is gaining in importance in the context of scarcity of resources and increasing the efficiency of manufacturing processes. An increase in measurement accuracy can result, for example, not only in raw material savings, but also in fewer pollutant emissions. Secondly, the calibration of thermometers can be relevant to safety. If measuring instruments in the chemical industry, for example, do not supply the correct values and if they result in faulty control of chemical processes, a risk of explosion may arise.
The importance of calibration is also evident in everyday examples if one thinks, for example, of meters for gas and water consumption in the home or the fuel meters on service station fuel pumps. It is therefore obvious that a regular calibration of thermocouples or resistance thermometers is necessary in order to re-confirm the confidence in the measured value or to determine any change over time. If in doubt, the thermometer can be readjusted or replaced before the process is damaged.
Thermometer calibration – requirements and traceability
Calibrating temperature measuring instruments is an expense that many companies cannot or will not afford on their own. This is especially true for processes that are certified in accordance with ISO 9001 and comparable quality assurance systems. QA systems require a regular check of the measuring instruments, which must be traceable at the same time.
The topic of “traceability” can be described as follows: In order to be able to reliably compare measurement results, they must be able to be “traced back” to a standard (national or international) via a chain of comparative measurements. To this standard, the display of a measuring instrument used or a material measure is compared. This can be done in one or more stages. At each of these stages, a calibration is performed on a standard previously calibrated with a higher-ranking standard. The standards are subject to a defined ranking. These range from working or factory standards to reference standards and national standards. In accordance with this ranking, there is a calibration hierarchy of the executing bodies. These range from the in-house calibration laboratory to accredited calibration laboratories and the national meteorological institute.
Thermometer calibration – performing in certified laboratories
Control measurements in Germany are usually performed by calibration laboratories certified by the German Accreditation Body (DAkkS). Frequently, measurement technology manufacturers also have such facilities themselves. They work independently of product and are able to carry out complex services. These range from checking a working standard to calibrating customer-specific designs such as pre-assembled multipoint thermometers.
Together, the quality management of the customer and the laboratory can develop the calibration processes necessary for a plant. It is necessary to define where standard checks are sufficient, where customer-specific solutions make sense, or whether downtime in the process should be reduced by using a certified mobile calibration laboratory. For this, the customer contacts the laboratory to define the relevant temperature points and measurement uncertainties. These are used to derive the equipment that must be used for the calibration. In general, a distinction is made between two methods when calibrating thermometers – the fixed-point calibration and the comparative calibration.
Thermometer calibration – WIKA as a reliable partner
WIKA offers both fixed-point calibration and comparative calibration. The appropriate calibration method is determined by the requirement for accuracy and the type of test item. Calibration of a thermometer can take place in a temperature range of -196 °C up to +1200° C. For the certificates, the choice can be made between a 3.1 inspection certificate or DKD/DAkkS certificate. For temperature measuring instruments, a calibration cycle of one year is generally recommended.
Generally, we calibrate regardless of manufacturer. Our spectrum includes, among others, electrical thermometers with transmitters, resistance thermometers and thermocouples. WIKA has been a member of the German Calibration Service (DKD) since 1982. Since then, we have been actively contributing our experience to the DKD working groups and standardisation committees. Our calibration laboratory and mobile calibration service are accredited in accordance with DIN EN ISO / IEC 17025.
Note
If you have any questions, please do not hesitate to contact our service team workdays from 7 am to 4 pm (Fri. until 3 pm) by telephone on +49 9372 132-5019. For more information about our calibration & service centre, visit the WIKA-Webseite. Our range of temperature measuring instruments can be found here.
See also our article
Comparative calibration vs. fixed-point calibration


Fantastic, well-written post covering everything someone needs to know about thermometer calibration. Some people find calibrating temperature measurement devices tricky, hopefully this helps them.